
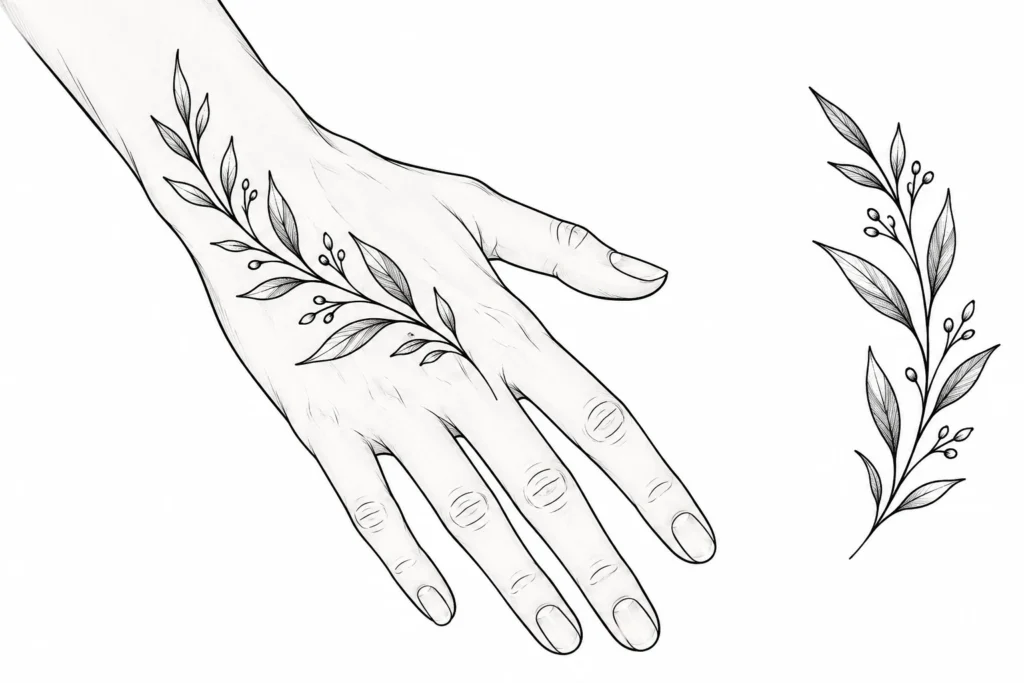
A hand tattoo drawing helps you explore a design’s shape, placement and detail before discussing it with a tattoo artist. You might need a sketch for inspiration, a printable reference or a way to develop your own concept. Each serves a different purpose, but the aim is the same: make your idea clear enough for an artist to assess and refine for your hand.
You don’t need polished drawing skills to prepare a useful reference. A simple outline with notes about size, direction and the features you care about can communicate plenty.
What kind of hand tattoo drawing do you need?
Start with what you want the drawing to help you decide:
- Reference sketch: explores a motif or style, such as a leafy sprig with an open outline. It helps explain the look you want.
- Printable design: gives you a paper version to annotate or compare at an approximate size. Printing artwork doesn’t make it ready to tattoo.
- Placement mockup: positions a design on a hand outline or photograph so you can consider its location and proportions.
- Artist-prepared stencil: provides a guide for transferring the agreed design onto skin as part of the tattoo process. It serves a different purpose from your initial concept sketch.
For a consultation, a reference sketch or placement mockup is a useful starting point. If you already have a printable drawing, bring it with notes explaining which parts matter and which can change.
Choose the placement before refining the design
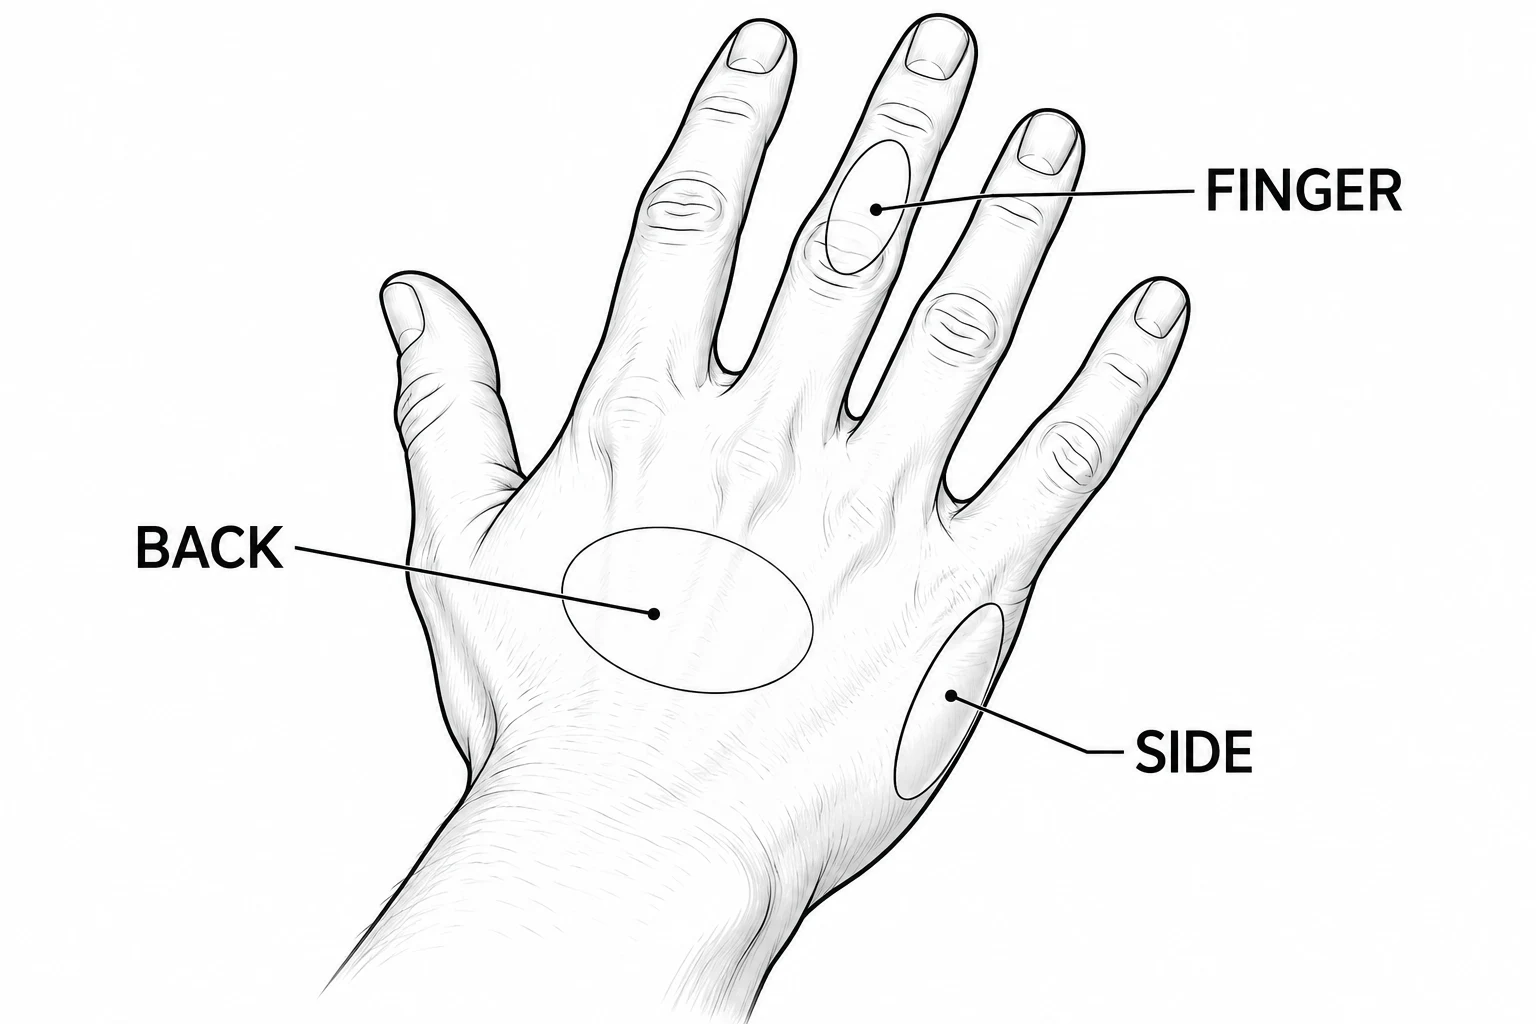
Specify whether you mean the back of the hand, a finger or the side of the hand. Then mark the intended boundaries: where the drawing begins, where it ends and whether it extends toward the wrist or knuckles.
Next, choose an orientation. For a leafy sprig, decide whether the tip points toward the fingers or toward the wrist. For lettering or a recognizable symbol, explain how you want it to appear when your hand rests naturally. A quick arrow on the drawing can make this clear.
Also note whether the design should stand alone or connect with an existing tattoo. If a connection matters, include a photograph of that tattoo among your references.
Mark the placement area before adding the motif, so the drawing has a clear boundary.
Build a simple concept sketch
Use paper or a drawing app, whichever makes it easier to revise. Keep one example throughout the exercise: a leafy sprig placed on the back of the hand.
Start with a hand outline
Draw a loose outline of your own hand or use a photograph as a placement reference. It doesn’t need to be anatomically polished. Mark the wrist, knuckles and chosen area so the design has a clear relationship to your hand.
Block in the main shape
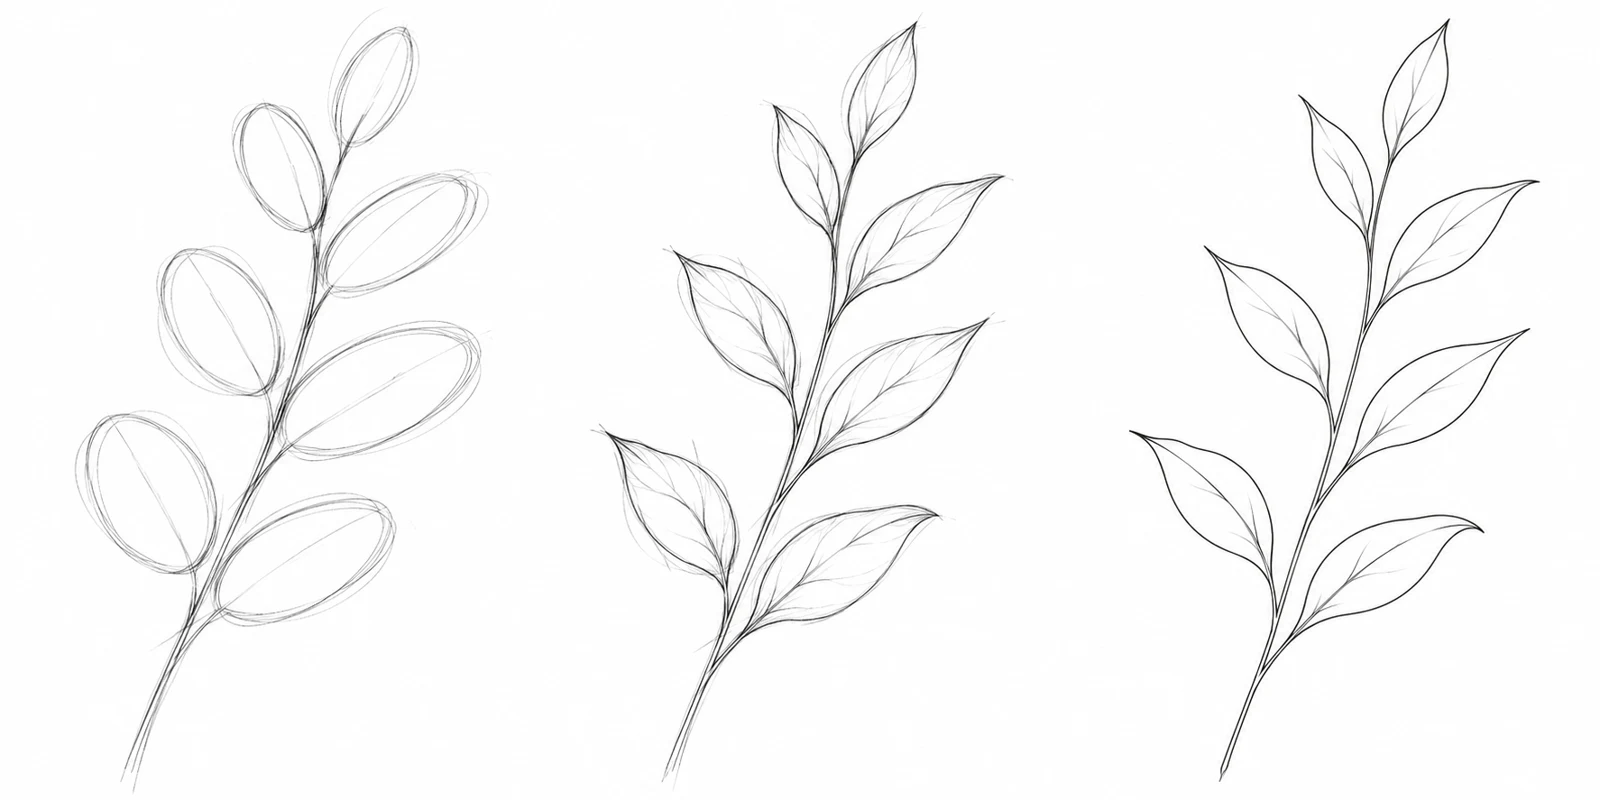
Draw one curved line for the stem, then use simple shapes for a few leaves. Concentrate on the overall direction and how much space the sprig occupies. Leave leaf veins, shading and texture for later.
Try a second version with a different curve or fewer leaves. Comparing two simple arrangements can help you identify what you prefer before spending time on details.
Add only the details that explain your idea
Refine the leaf outlines and indicate any essential features, such as pointed tips or an asymmetrical arrangement. Leave visible space between elements. If you’re unsure how to draw something, write a note beside it.
The three stages show how a simple stem and leaf shapes can develop into a clearer concept.
Compare the drawing at its intended size
A design viewed large on a screen can give a different impression from the same drawing at the size you intend to wear. Print a version at your proposed dimensions, or use a digital mockup with a clear size reference. Check the printed measurements with a ruler; a printer’s “fit to page” setting may change the scale.
Compare the drawing beside your own hand or position it over a photograph. Look at the main shape first: can you recognize the motif without enlarging it? Then consider whether the smaller details are essential or simply decorative.
For the leafy sprig, compare a version with several small leaves against one with fewer, larger leaves. Notice which arrangement communicates your idea more clearly.
This comparison helps you prepare questions. Ask the artist which details and spaces they recommend adjusting for the placement and intended size. A paper mockup cannot establish how a finished tattoo will heal or age.
Prepare your references for the tattoo artist
Bring one preferred sketch, plus an alternative if you’re still deciding. Label them clearly so the artist knows which direction you favor.
Include these details:
- Placement: the specific area of the hand and the intended boundaries.
- Approximate dimensions: height and width in centimeters or inches.
- Orientation: which way the design should face, supported by an arrow if useful.
- Essential features: the motif, overall shape or details you want to preserve.
- Flexible elements: details, proportions or positioning you are happy to discuss.
- Relevant references: a small selection showing particular qualities you like.
Explain each reference specifically: “I like the curved stem and the space between the leaves” gives clearer direction than “something like this.” Use another person’s tattoo to describe preferences while asking the artist to develop your own design.
Treat printable artwork as a discussion reference too. The artist still needs to assess its suitability and any adaptations required.
Find more help for your chosen direction
If you’re still deciding whether this placement suits your overall idea, explore the broader guide to hand tattoos before refining the sketch.
For a concept involving bones across the hand or fingers, browse skeleton hand tattoo ideas to narrow down the visual direction you want to discuss.
Your next step is a simple drawing with placement, approximate size and essential details marked. Bring that brief to a tattoo artist and use it to work through the remaining design decisions together.

